Imagine how effective it would have been, if you could just add four extra links to different pages of your website below your ads (in addition to the main landing page) and enable your visitor to directly visit those pages, with no extra CPC.
Well this is possible if you enable Google Adwords Sitelinks Extensions in your ad campaigns. I have already discussed the benefits of using Sitelinks Extensions in my previous blog post on Google Adwords Ad Extensions Benefits.
So let’s talk about how to,
Setup Google Adwords Sitelink Extensions in your ad campaigns:
Sitelink Extensions can be added to both your Enhanced ad campaigns and non-enhanced ones (aka Legacy Ad Campaigns); but there are different procedures to do that. So you first need to know what type of ad campaign you have. For this,
- Login into your Adwords account
- Click on the Campaigns tab
- Check the Enhanced column, to know whether your campaigns are enhanced ads or legacy ads.
Sitelink extensions on enhanced ad campaign are called Upgraded Sitelink Extensions which are easier to manage and provide more detailed reporting; though they look nothing different from non-enhanced sitelinks.
Now, let’s discuss the steps to add a new sitelink extension in your ad campaign:
Step 1 | Login into Adwords > Select the Campaign in which you want to add sitelink extensions |
Step 2 | Click the Ad Extensions tab |
Step 3 | From the “View“-drop down menu, select Sitelink Extensions |
Step 4 | Choose Upgraded option, next to the “View” drop down menu |
Step 5 | Next to the Sitelinks settings, click Edit |
Step 6 | Click on the New button, to create a new sitelink |
Step 7 | Fill in the Sitelink text and the URL |
Step 8 | Choose your preferred Device, or enter a description. These are optional fields |
Step 9 | Finally, click Save |
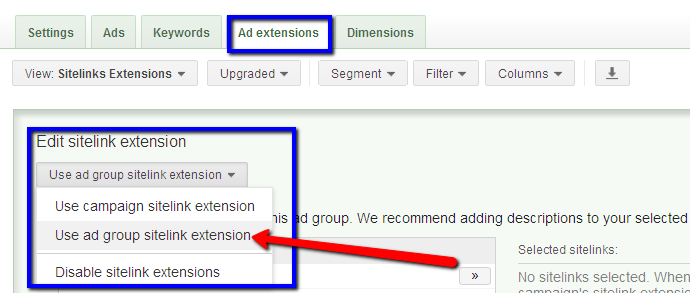
Google Adwords Sitelink Extensions enables you to add sitelink extensions to a specific ad group also. Check out the steps below to know the steps to do so.
Step 1 | Go to Adwords > Click on the Ad group in which you want to add sitelink extension |
Step 2 | Click on the Ad Extension tab |
Step 3 | From the “View“-drop down section, select Sitelink Extensions |
Step 4 | Choose Upgraded option, next to the “View” drop down menu |
Step 5 | Next to the Sitelinks settings, click Edit |
Step 6 | Choose Use ad group sitelink to create sitelinks specifically for the ad group.  |
Step 7 | Click on the New button, to create a new sitelink > Fill in the Text & URL |
Step 8 | Click Save |
That’s it! Get started with your Sitelink Extensions now.


