We have already talked about how Google Adwords Ad Extensions can help you get the most out of your PPC marketing efforts on Google. Now that you also know How to setup Location Extensions to increase your business’s visibility, let us learn how to implement Product Extensions in our ad campaigns.
This is how an ad with Product Extensions enabled on it would appear. Pretty neat, isn’t it!
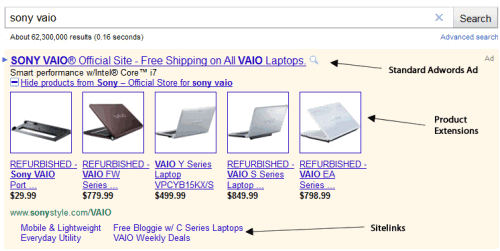
Product extensions pull product details (like product title, images, prices, brand name, etc.) from your Google Merchant Center (GMC) account. It highlights relevant products below the ad copy, whenever a user enters a search query that matches any of the product details present in your GMC account.
For Instance: Look at the image above. As a result to the search query ‘Sony Vaio’, five images and product details of Sony Vaio Laptops are shown as sponsored ads on the page along with there prices. Looks good, right?
Now to enable this extension on your ad campaigns, it is really important that you have (or create) a Google Merchant Center account and upload your product details there. You can click on the link to read how to Set up a Google Merchant Center Account.
So, if you already have a GMC account, let’s discuss how you can link it with your Adwords account. This will help Adwords pull relevant product details and show it to your users.
Steps to Link your Google Merchant account with Adwords:
Step 1 | Login into your Google Merchant Center account (or create one and upload all the product details) |
Step 2 | Go to Settings |
Step 3 | Click on Adwords |
Step 4 | Enter your Adwords Customer Id 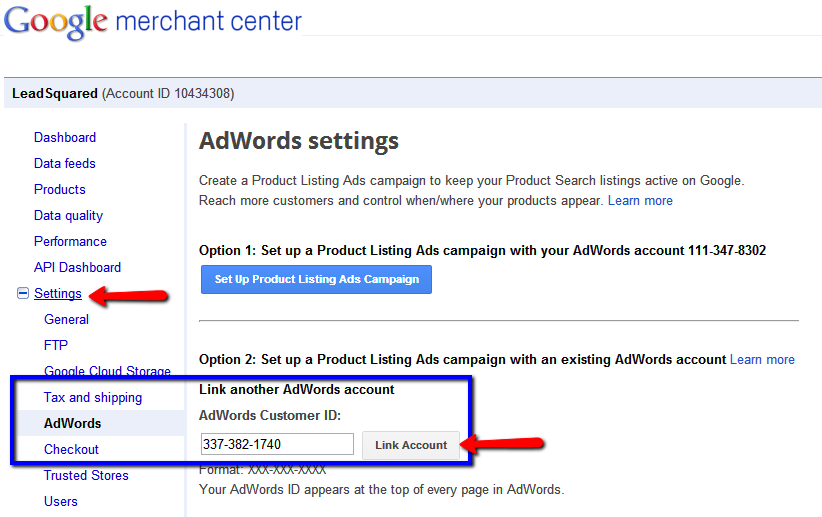 |
Step 5 | Click Link Account |
Great job, marketers! Now that you have linked your Google Merchant account with your Adwords, let’s discuss how you can setup Product extensions in your ad campaigns.
Steps to setup Product extensions in your ‘New’ ad campaigns:
Step 1 | Login in to your Adwords account |
Step 2 | Click on the New Campaigns tab 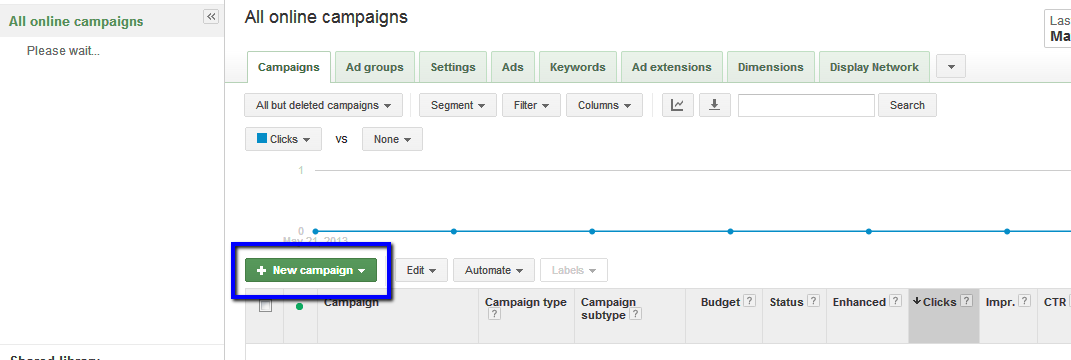 |
Step 3 | Select Campaign type 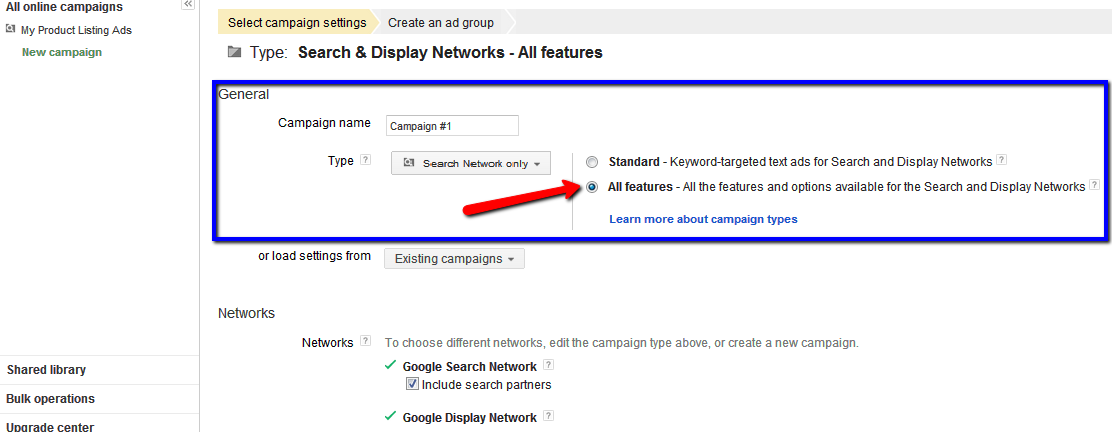 (make sure you check the radio button next to ‘All Features’) |
Step 4 | Under Ad Extensions > Product listings ads, check the box next to ‘Use product information from Google Merchant Center to create and target ads’ |
Step 5 | Select the Google Merchant account you would like to associate with the ad campaign 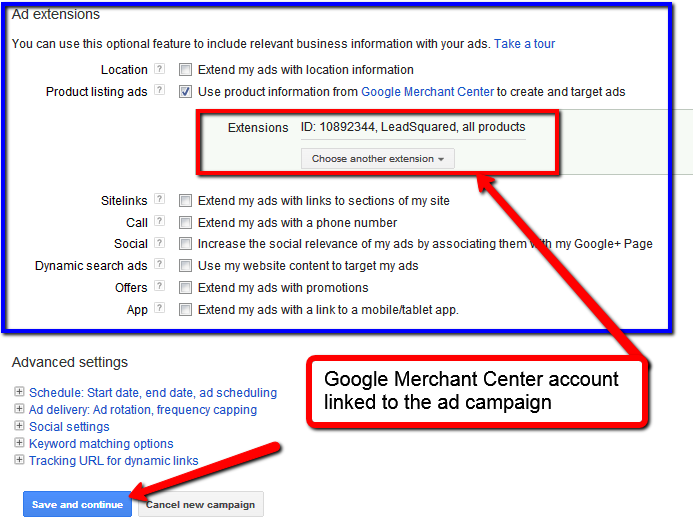 |
Step 6 | Click Save and Continue |
Simple, right? While creating a new Adwords campaign with product extension comes easy, inserting product extension in an existing campaign is easier. Have a look!
Steps to setup Production Extensions in your ‘Existing’ ad campaign:
Step 1 | Login in to your Adwords account |
Step 2 | Click on the name of the Campaign in which you want to insert the product extension |
Step 3 | Click on Ad Extension tab |
Step 4 | Select View: Product extension from the drop down menu 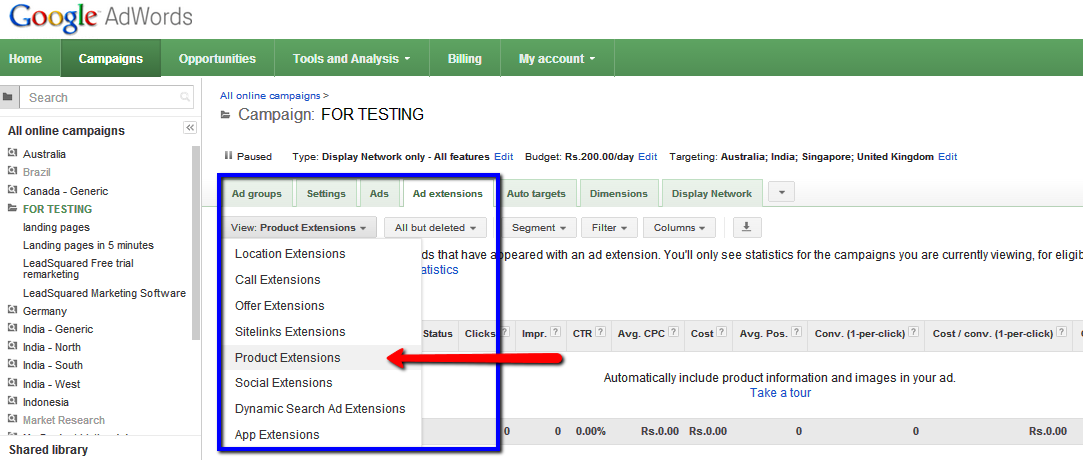 |
Step 5 | Then click on the New Extension tab 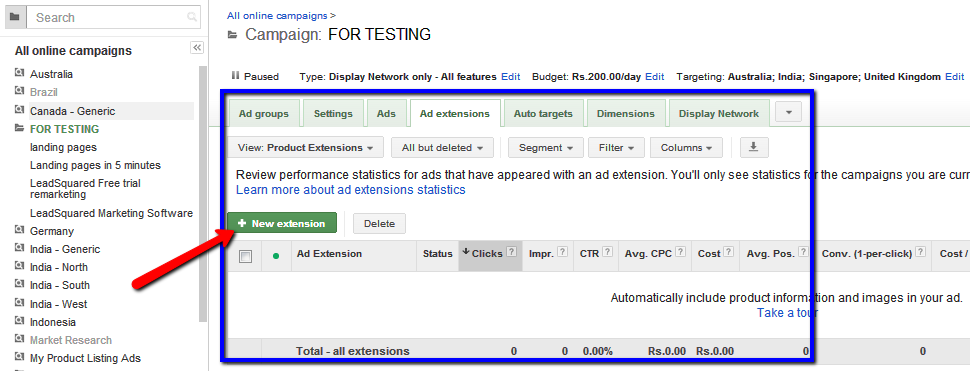 |
Step 6 | Choose the Google Merchant account from the ‘Select extension’ drop down menu 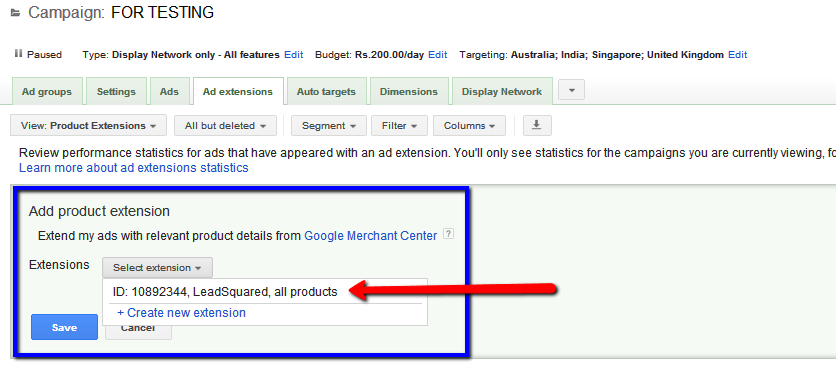 |
Step 7 | Click Save |
Well, there is a lot more to Google Adwords Product Extensions; but I don’t want to overload you all with extra information. So that’s all for this blog post. I will surely expand on the topic on my next post, very soon. Keep reading till then!


