Not too long ago, life was easier for Facebook marketers; they could custom land the page visitors to a static page, and drive them to an action (for instance, liking their page, or even filling in a form), in return for something desirable (like Lead Capturing etc.).
Generating leads or garnering ‘likes’ was easier back then.
That option, however, Facebook did away with, when they introduced the Timeline, back in early 2012. Therefore, a static landing page is not possible any more. However, what you can do is create a customised tab, and place it in your Facebook Page.
Today I would guide you through the process to create Facebook Landing Pages, and this is how the end product would appear:
How exactly would this help?
Now, this would help you because:
1) This tab would have its own URL, thus allowing you to link it to a Facebook Ad, or a post elsewhere.
2) People landing on your Facebook Page might also notice and click on it due to curiosity.
3) You can use this space, not just for a custom form, but to add a number of different tabs, for instance content of your YouTube Channel, your blog posts etc.
Let us get started then:
Steps to Create Facebook Landing Pages
There are quite a few third party applications that would allow you to create or host landing pages on Facebook. However, I will go with two applications that are extremely user-friendly and easy to set up – LeadSquared’s Landing Page App (to host landing pages on Facebook) and iframehost (to create landing pages on Facebook).
LeadSquared’s Landing Page App:
[Tweet “Use LeadSquared’s Facebook App to host a landing page for your company, on Facebook.”] Note that you have to create a landing page in LeadSquared first and then host it on Facebook. Here’s an E-Book that will help you create Landing Pages in LeadSquared.
Once you have created a landing page in LeadSquared, follow the given steps to host that landing page on your company page on Facebook. Here’s how you can get there:
Step 1: Log in to your company’s Facebook Page.
Step 2: Go to iframehost.com. The window in the below image appears:
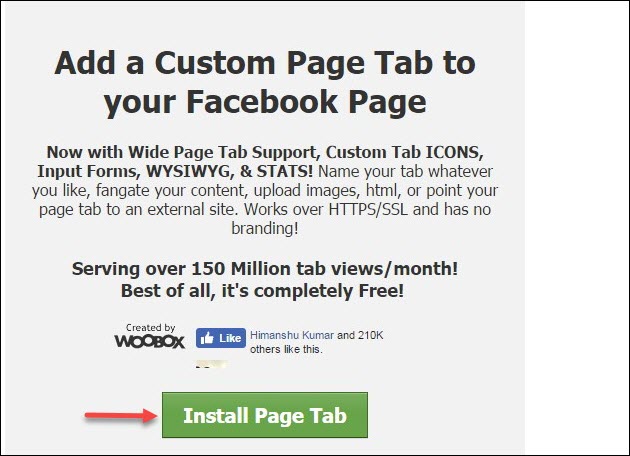
Step 3: Click Install Page Tab. It redirects you to a Facebook page.
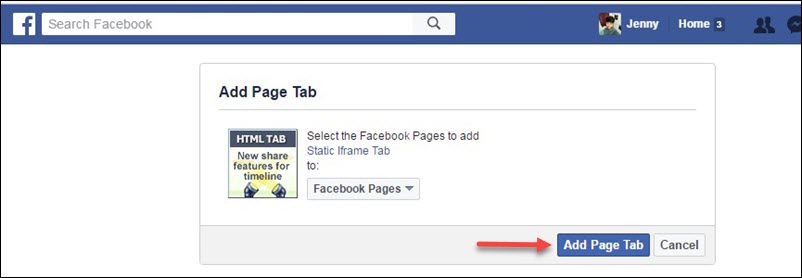
Step 4: Click the drop-down list highlighted in the image above and select the page to which you want to add your landing page.
Step 5: Click Add Page Tab. It redirects you to your page.
Step 6: Click Configure Page Tab.
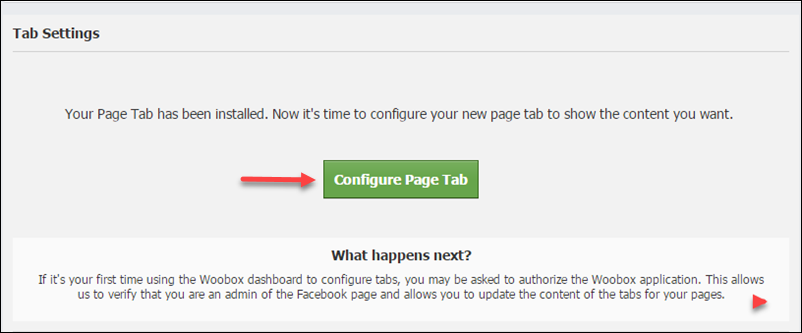
Step 7: It redirects you to a woobox page.
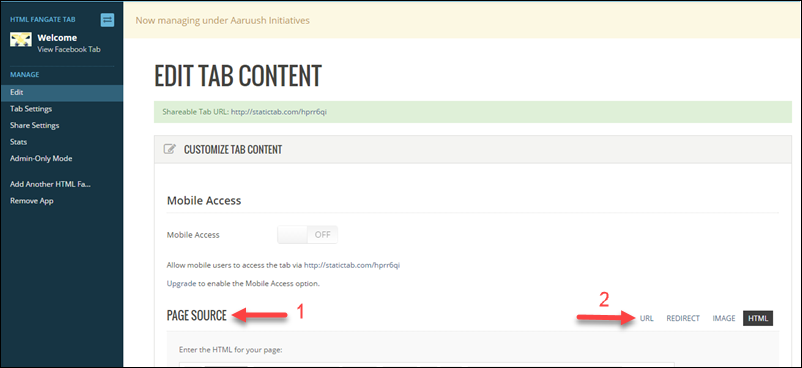
Step 8: Under the Page Source column, click the URL. Enter the URL of your landing page. Select height as per your preference and select the type of audience who should see your landing page under fangate settings.
Note: The URL should be https URL as Facebook do not accept http URLs.
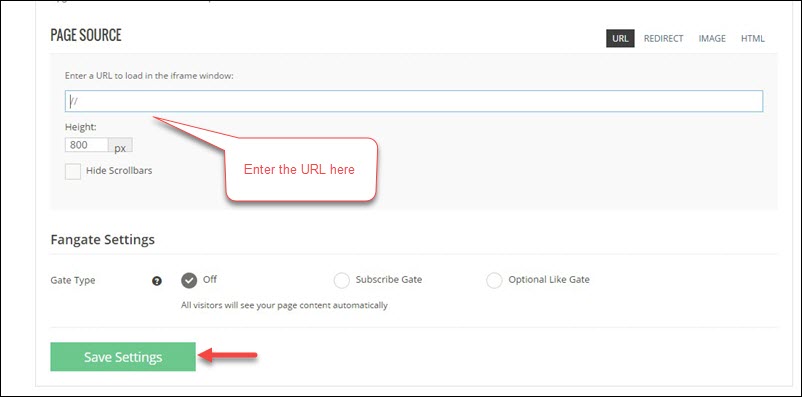
Step 9: Click Save Settings.
Step 10: Click Tab settings to change the tab name, tab icon and so on of your tab.
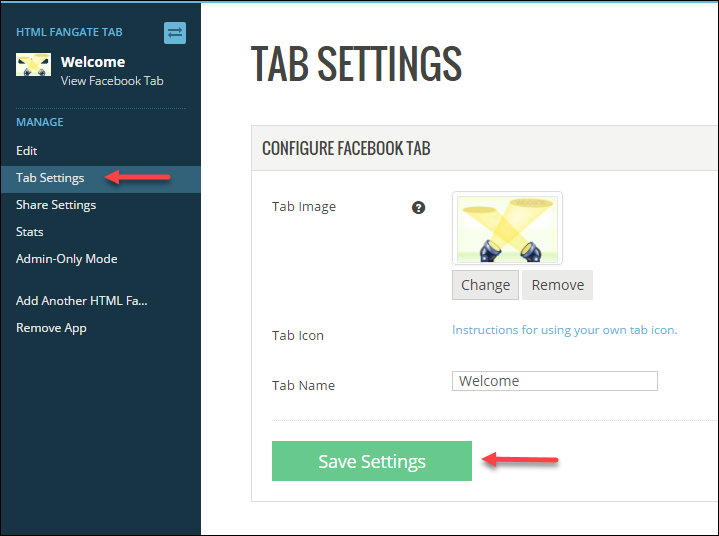
Step 11: Once the settings are changed, click Save Settings.
Once this is completed, go to your Facebook page and refresh. Your required tab along with the landing page is now present in your Facebook page.
Go ahead; create Facebook landing pages on your own now, and let us know how it went. :)
